How to Register for Your Pearson Edexcel Exams (Private Candidate Guide)
If you’re planning to take your Pearson Edexcel exams privately, the process can feel a bit overwhelming at first. But don't worry! I’ve put together this step-by-step guide to help you navigate the British Council registration portal smoothly. Just follow along, and you’ll have your registration done in no time.
Step 1: Visit the British Council Portal
Go To: https://schoolexams.britishcouncil.org
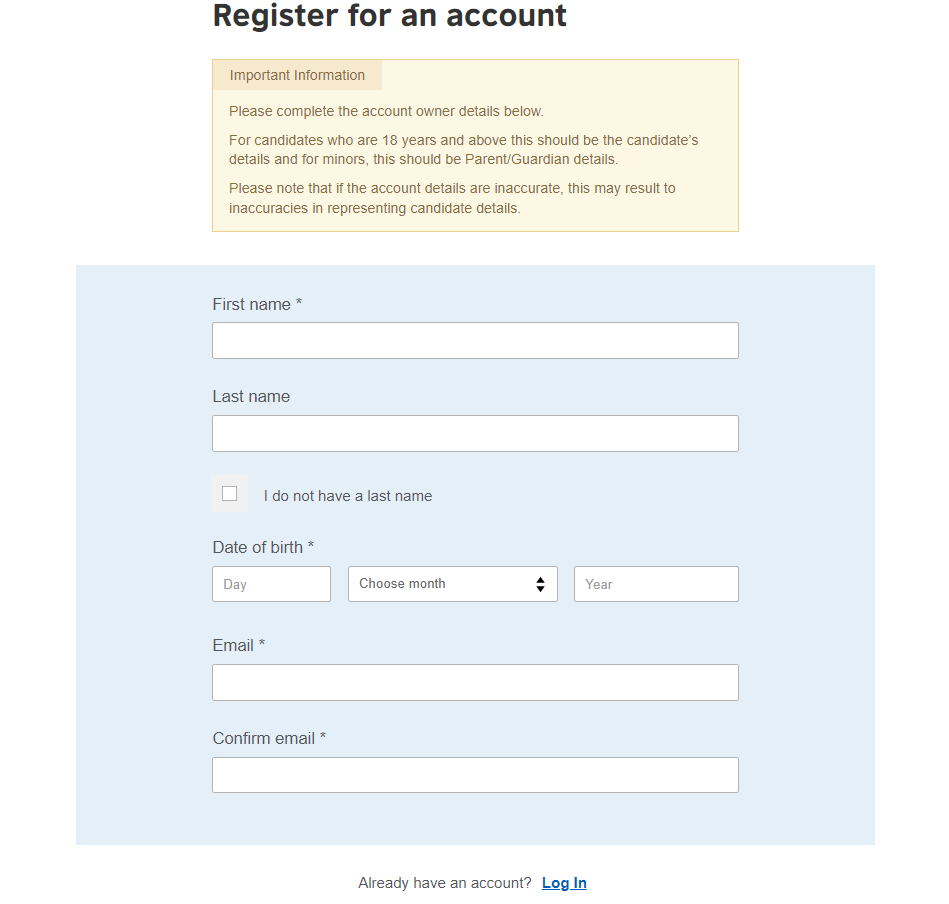
Step 2: Create Your Account
Enter your full legal name (as on CNIC/Passport/B-Form), date of birth, and a regularly checked email. Already registered before? Just log in.
Step 3: Activate Your Account and Log In
Check your email for an activation link from British Council. Click it to verify your account, then log in. Not received? Check spam or request a resend.
Step 4: Selecting Your Location
After logging in, you’ll be greeted by the official British Council registration landing page. This is where the system tailors the experience to your specific region.
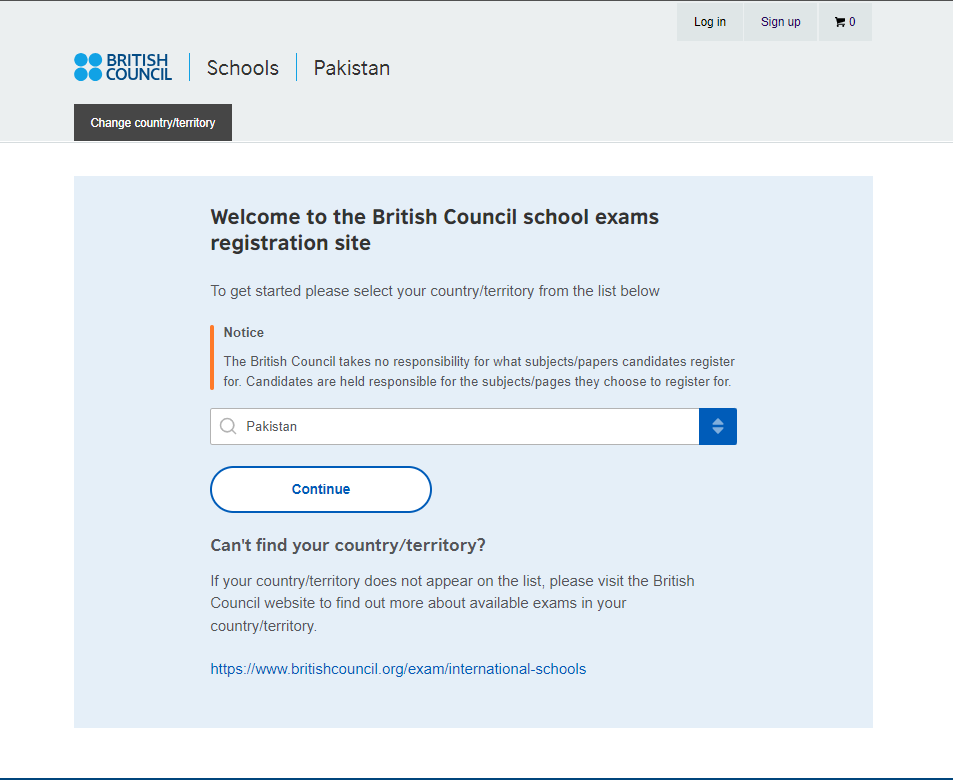
.Choose Pakistan from the country list and click Continue.
Step 5: Choosing Your Awarding Body
Once you’re logged in and have your profile ready, you’ll land on the "Search for exams" page. This is the starting point for building your exam schedule.
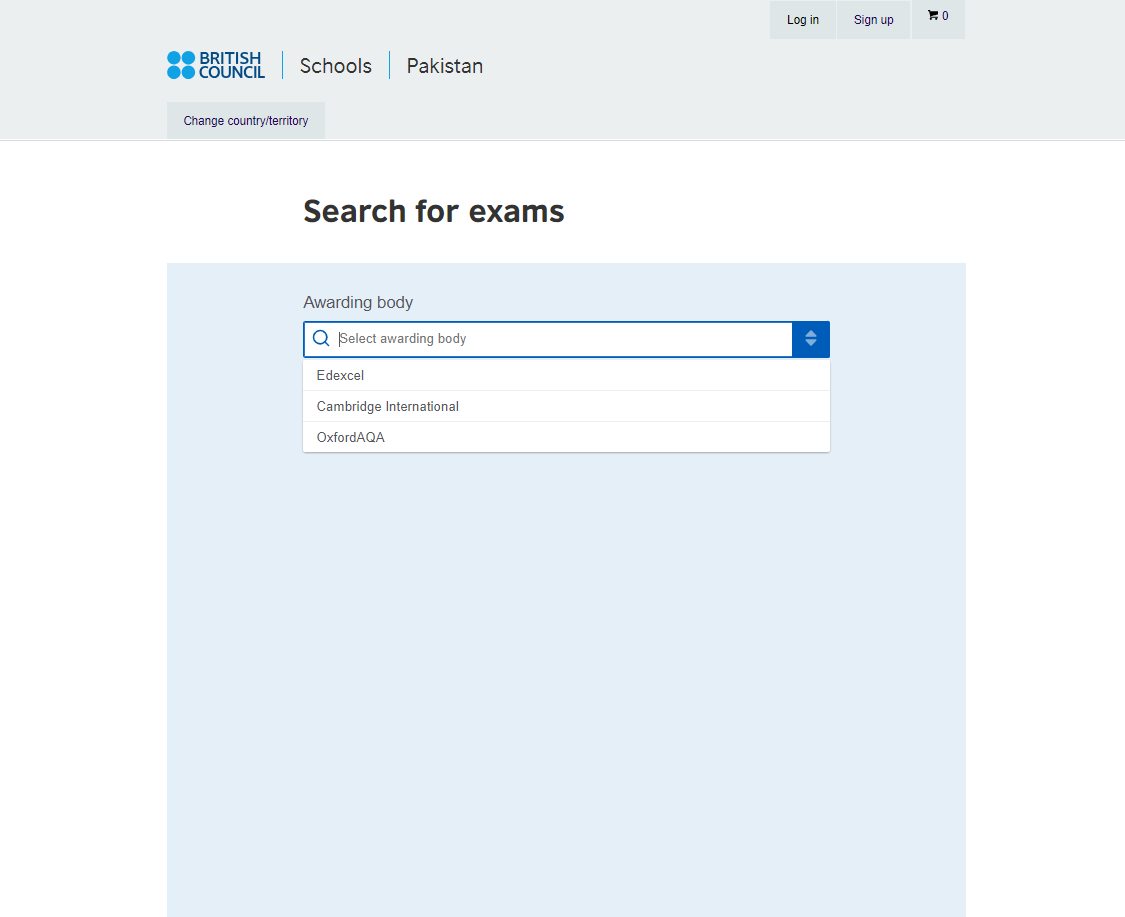
Select Edexcel from the dropdown menu.
Step 6: Choosing Your Session & Qualification Level
Once you’ve selected "Pearson Edexcel" as your awarding body, two new dropdown menus will appear: Session and Qualification Level.
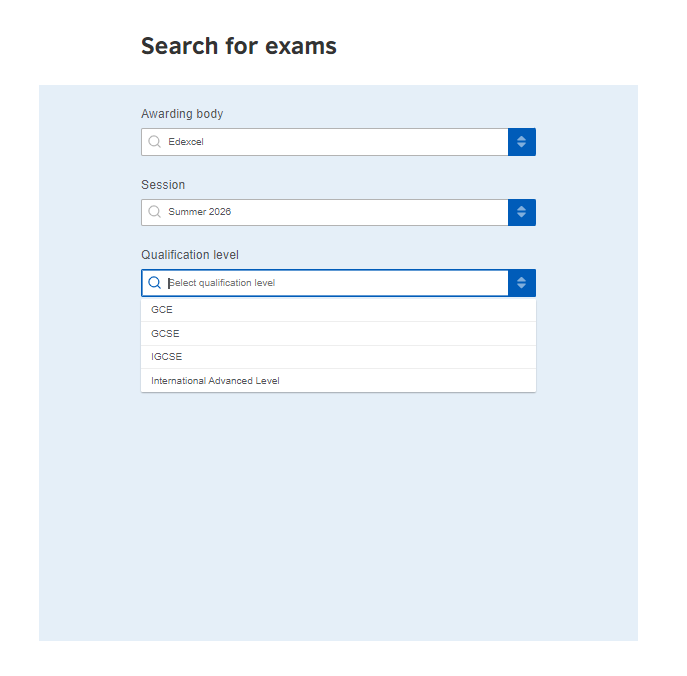
Choose Summer 2026 as your session. Then select your level: IGCSE, IAL (AS/A2), or GCE/GCSE depending on what you are studying
Step 7: Choosing Your Exam Location
Now that the system knows what you are taking, it needs to know where you’ll be taking it. A new dropdown called "Location" will appear.
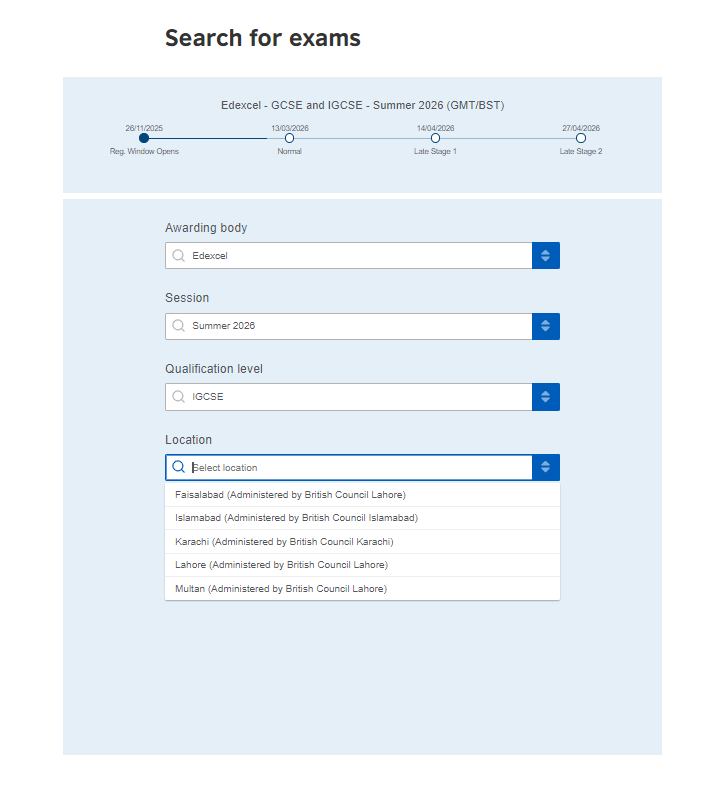
Select your city (Islamabad, Lahore, Karachi, Faisalabad, etc.)
Step 8: Selecting Your Subjects
Once you’ve set your location, the final dropdown menu for "Subjects" will appear.
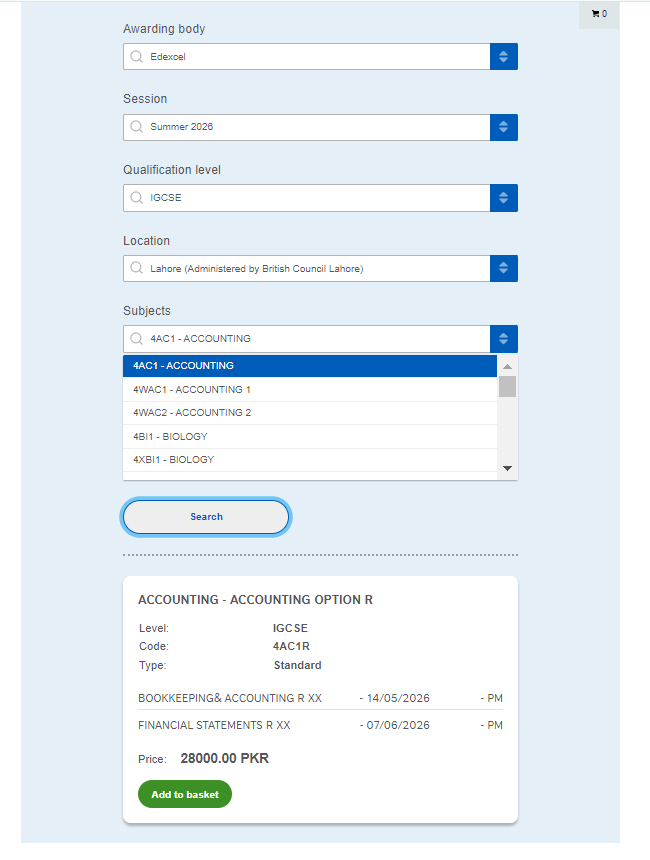
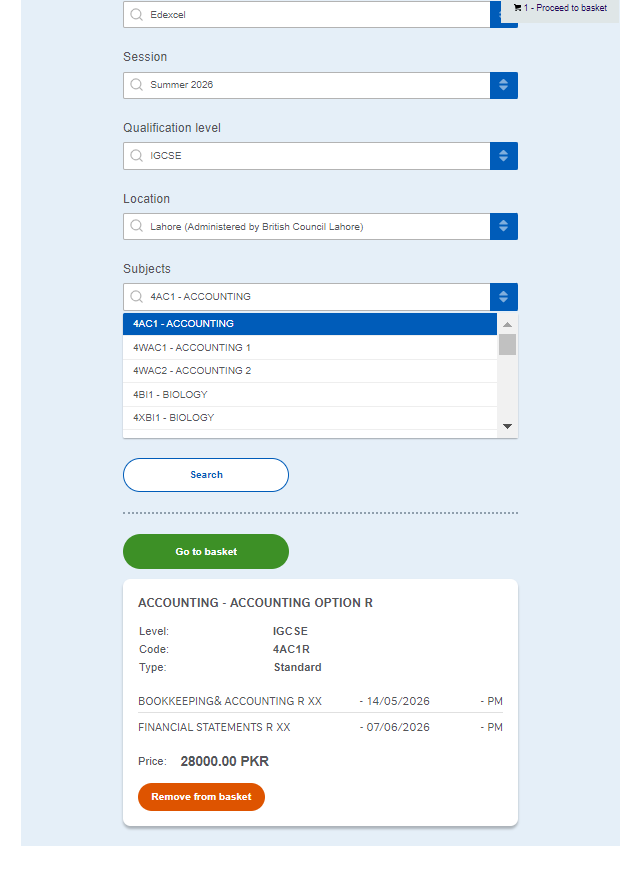
Search and add each subject. Match the 4-digit syllabus code carefully. Check dates, times, option codes, and price before confirming. Add all subjects before proceeding.
Step 9: Final Basket Review
Once you’ve added all your subjects, you’ll be taken to the Exam basket page. Think of this as your final checkout screen.
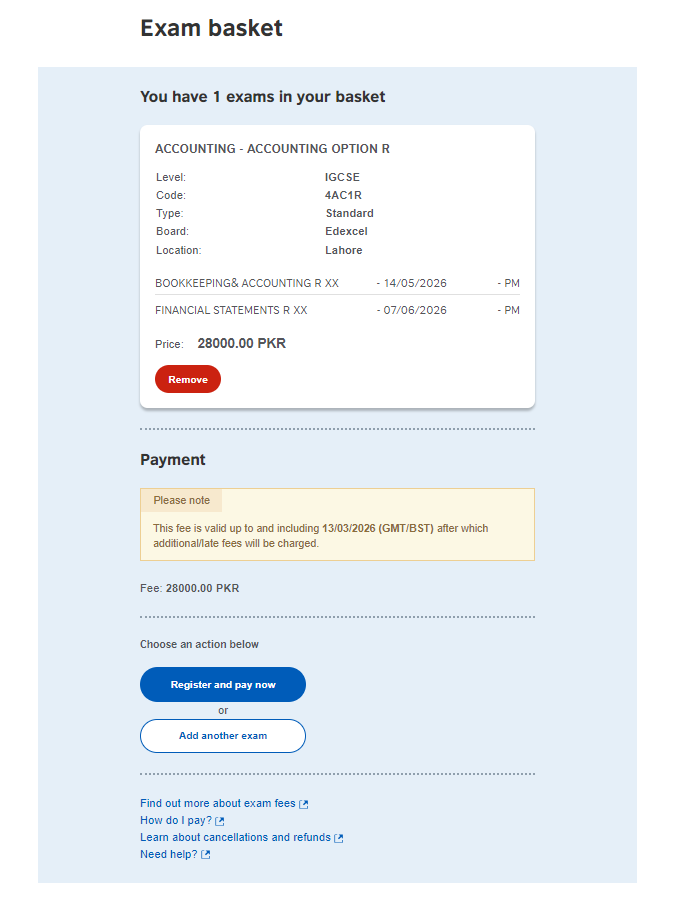
Verify subject codes, exam dates (AM/PM), and total fee. Note the late fee deadline — pay before it or the price increases.
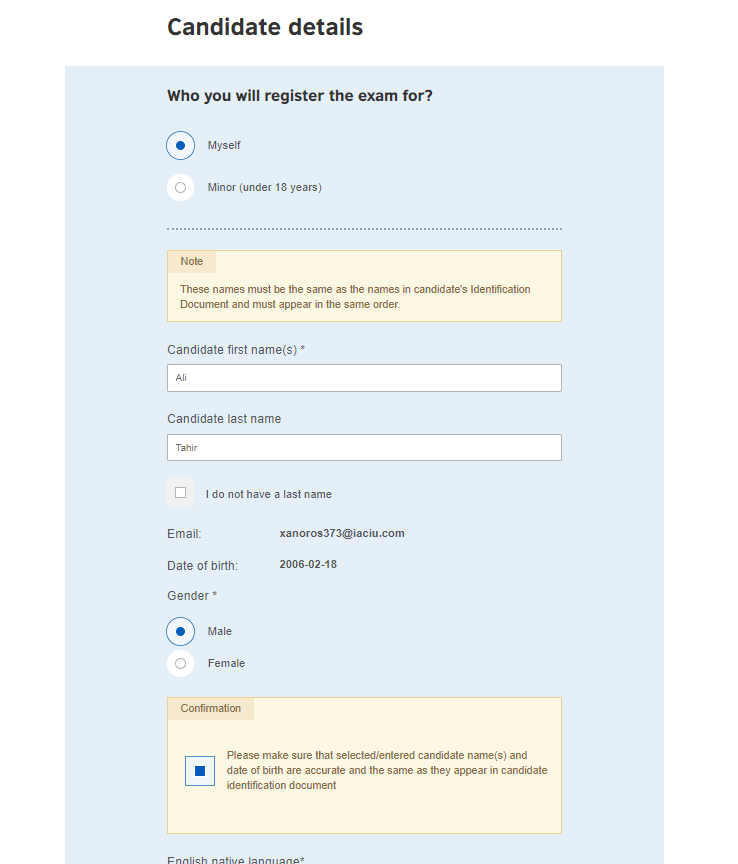
Step 10: Entering Candidate Details
Once you click "Register and pay now," you’ll be taken to the Candidate details form. Enter your legal name exactly as on your ID.
Contact & Address Information
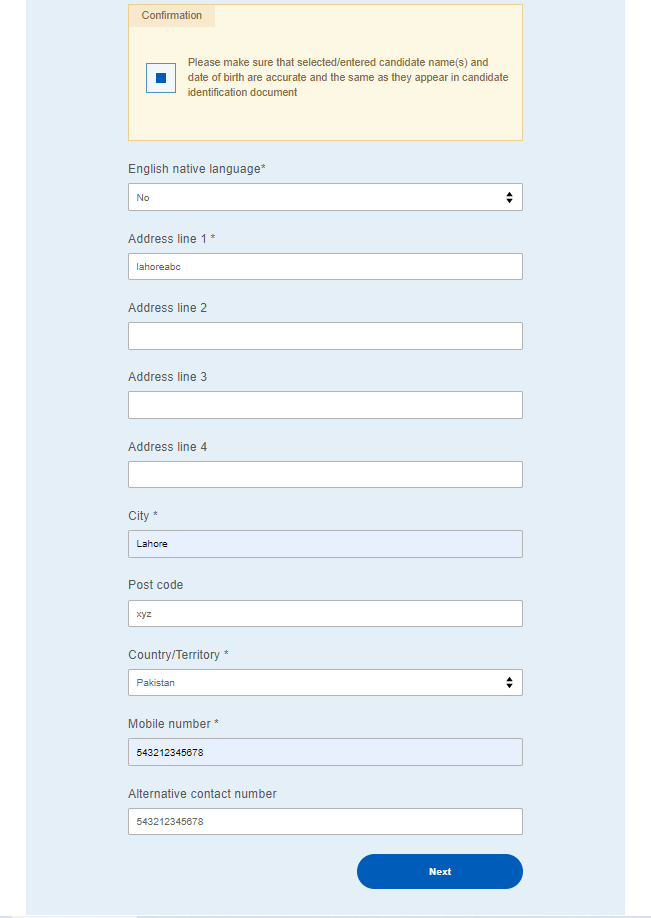
Fill in your address, city, postal code, and mobile number.
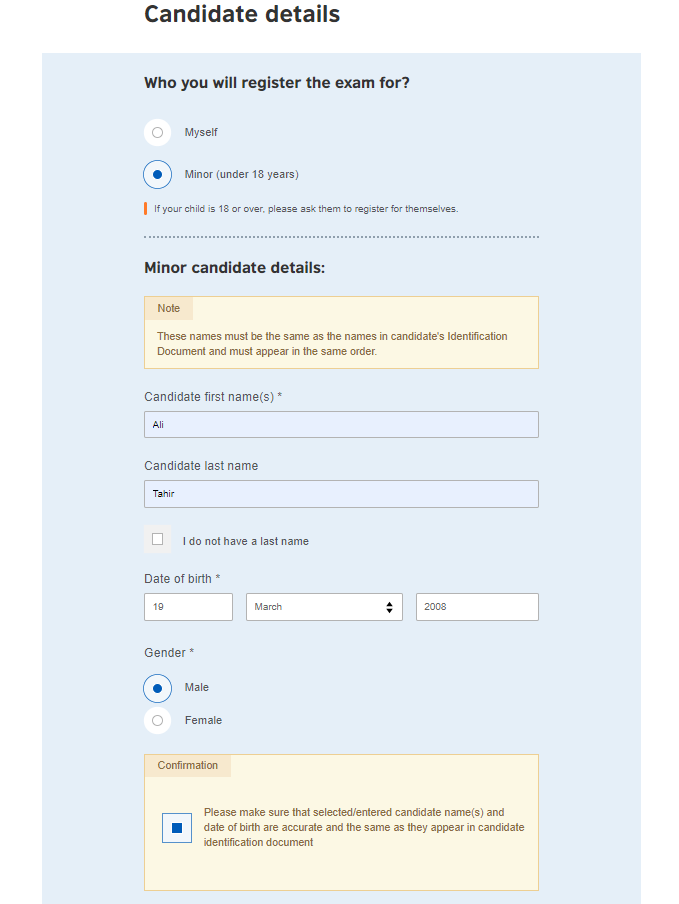
Step 11: Registering as a Minor (Under 18)
For students under 18, a parent fills in guardian details and child protection information
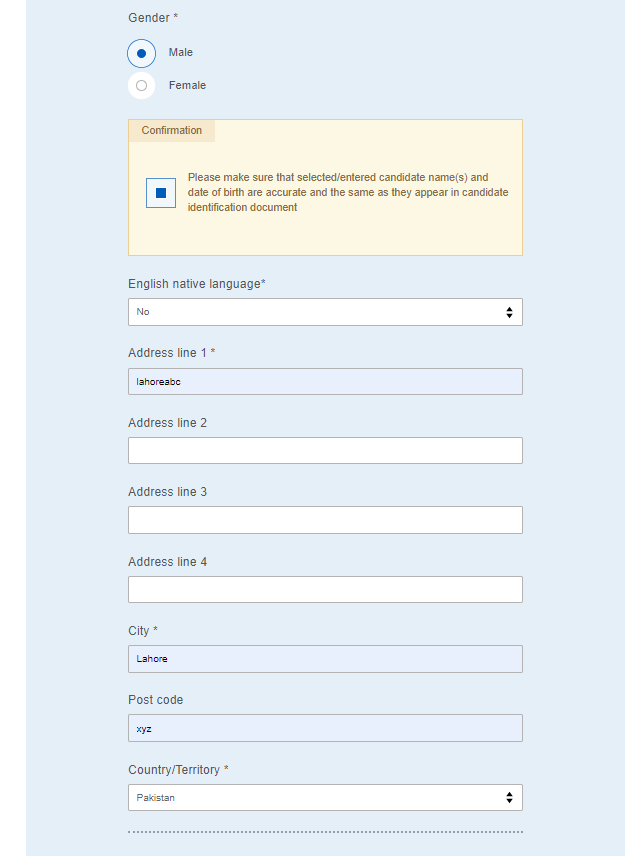
The next part of the minor registration is the contact info. Even if you live in the same house, this should be the primary address where you want the student's results mailed.
Child Protection & Contact Details
Because the student is under 18, the British Council needs to know who is responsible for them and how they will get home after the exam.
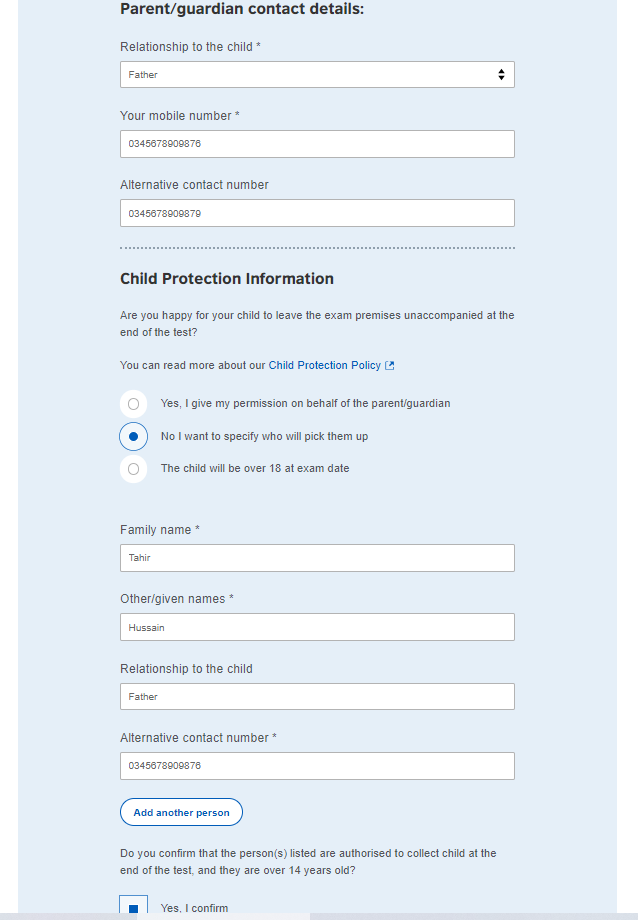
What to fill out here:
- Relationship to the child, Mobile Numbers, Child Protection Information, Authorization
Step 12: Identity Verification
Now that you’ve confirmed your subjects, it’s time to link your registration to your official identity.
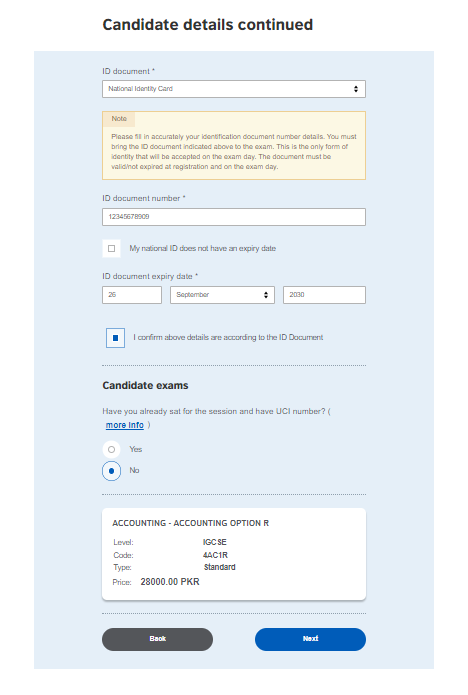
Select your ID type (CNIC or Passport) and enter the number carefully. First time taking Edexcel? Select No for UCI. Returning student? Enter your 13-digit UCI number.
Step 12:Terms and Conditions
You’re almost at the finish line! Before the system lets you pay, it’s going to show you a long page of Terms and Conditions. Read and tick the box, then click Complete Registration.
Step 13: Choosing Your Payment Method
Choose your preferred method:
- Online Visa/Mastercard, confirmed instantly
- Offline Cash or bank transfer at Standard Chartered (SCB) or MCB. Use your unique 16-digit Virtual Account Number. Payment reflects in 2 to 3 working days.
Step 14: Registration Confirmation
- Note your A2PK reference number.
- Watch your email for payment confirmation and your Statement of Entry which arrives 2 weeks before exams.
Step 15: Your Official Registration Email
Once you’ve hit that final button on the portal, check your inbox! You will receive an automated email from the British Council.
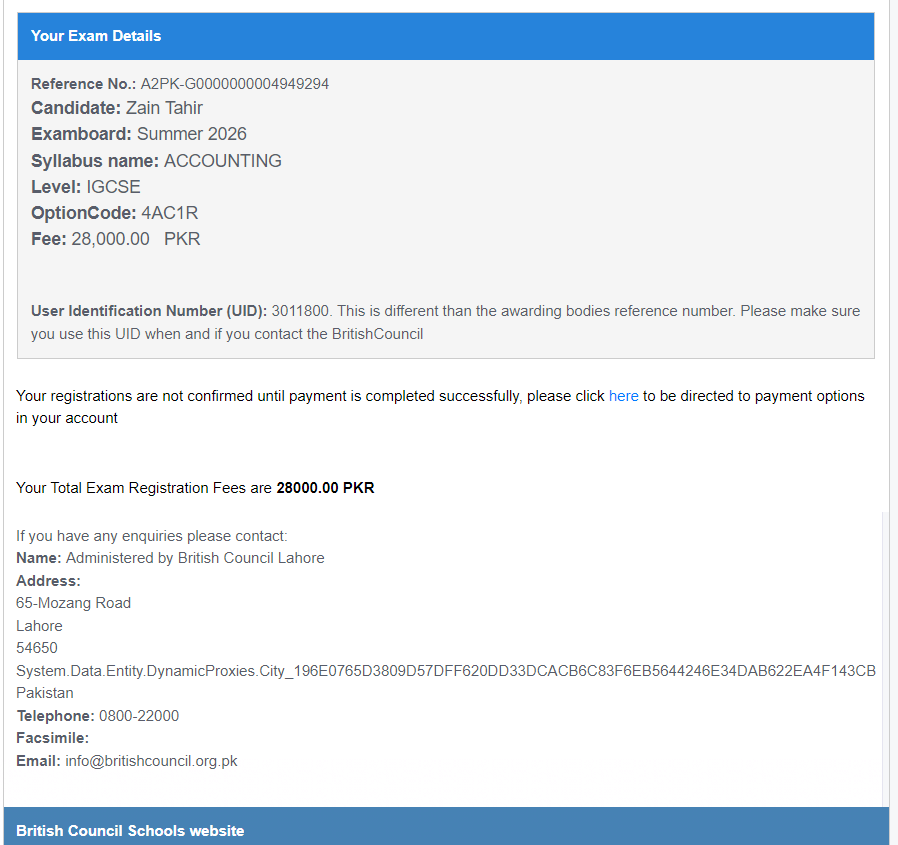
What this email tells you:
- The Reference Number
- The UID
- Your Exam Line-up
- Payment Status
What to do while you wait:
- Monitor your Inbox
- Double-Check the Dates
- Keep your ID Safe
Need Help?
If you run into any technical glitches or have questions about your specific subjects, you can always reach out to the British Council Pakistan directly:
- Email: info@britishcouncil.org.pk
- Helpline: 0800-22000
Good luck with your studies! You’ve done the hard work of signing up now it’s time to focus on aceing those exams.